How to Clean a Window Fan: Simple Steps for Fresh, Breezy Air
Maintaining the cleanliness of a window fan is essential for ensuring it operates efficiently and safely. Over time, fans accumulate dust and other particles that can hinder performance and potentially pose a health risk if not addressed.
Regular maintenance, including cleaning, helps extend the lifespan of the appliance and prevents the spread of allergens throughout the home.

Before initiating the cleaning process, one must take certain safety measures to avoid any potential hazards.
It is important that the fan is unplugged before any cleaning begins to prevent electrical shocks.
Additionally, using proper cleaning solutions and materials can prevent damage to the fan’s parts and ensure a thorough clean without leaving any residues behind.
Cleaning a window fan should be approached methodically to reach all the crevices where dust and dirt may lurk.
Attention to the blades, motor housing, and frame are important since they directly affect the fan’s performance.
Regularly tending to these areas not only promotes improved air circulation but also contributes to the overall well-being of occupants by reducing airborne irritants.
Preparation and Safety
When embarking on the task of cleaning a window fan, one must prioritize both preparation and safety. Properly prepping the work area and ensuring safety can prevent accidents and ensure a thorough cleaning process.
Unplug and Move the Fan
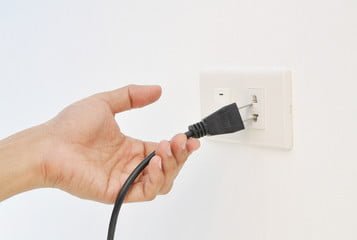
Before any cleaning can take place, the most important step is to unplug the fan to eliminate the risk of electric shocks.
Moving the fan to a well-ventilated space or outside can make cleaning easier and safer.
Gather Cleaning Supplies
One should gather all the necessary cleaning tools including a screwdriver, soft cloth, mild detergent, and a vacuum with a brush attachment.
If the fan is particularly dirty or if one is sensitive to dust, wearing rubber gloves and a mask is advisable.
- Basic Supplies:
- Screwdriver
- Soft cloth or sponge
- Mild detergent
- Vacuum with a brush attachment
- Rubber gloves (if needed)
Consult the User Manual
Before disassembling the fan, consulting the user manual is crucial.
It provides specific instructions and safety guidelines tailored to the model of the fan, ensuring that one cleans the fan properly without damaging any components.
Initial Cleaning
Before delving into the deep cleaning of a window fan, it is essential to start with an initial cleanup to remove loose dust and debris. This helps prevent dust from spreading around the room and makes the subsequent steps easier and more effective.
Remove Loose Dust
The first step is to eliminate all the loose dust that has accumulated on the fan.
One should lay down a sheet beneath the fan to catch the falling dust.
Using a vacuum cleaner with a brush attachment is a highly effective method.
Gently pass the vacuum cleaner over the fan, ensuring that the loosened dust is captured directly into the vacuum bag. This minimizes the potential for dust to recirculate in the room.
Clean the Grills and Blades
Once the loose dust has been removed, it’s time to focus on the grill and fan blades.
A vacuum with a brush attachment also works well for this step to pull dust from the crevices.
If a vacuum isn’t available, compressed air can be used to blow dust out from the finer parts of the grill and blades.
For more caked-on dirt, a soft-bristled brush can gently scrub the surfaces. However, one should be careful not to bend the fan blades or force the brush into delicate areas which might cause damage.
Disassembly
Disassembly is a critical step in cleaning a window fan, as it allows for better access to all parts that require cleaning. Correctly dismantling the fan ensures all areas are reached without damaging the fan.
Remove the Grill
The grill of the fan usually snaps off or is held in place by screws.
One needs a screwdriver to loosen these screws.
After the screws are removed, they should gently lift the grill off, taking care to note how it fits for easier reassembly.
Detach the Blades
The next step usually involves removing the blade cap, which holds the blades onto the motor shaft.
This typically requires rotating the cap counterclockwise. After removing the cap, they can slide the blades off the shaft.
Extract the Motor
The motor should be the last part to be disassembled, and it’s crucial only to proceed if they have experience or are following specific instructions for their model.
This will involve removing the fan cover, unscrewing additional screws, and carefully disconnecting the motor from any electrical connections.
It’s important to keep the tools and screws organized throughout the process.
Deep Clean Individual Parts

To ensure optimal performance and longevity of a window fan, it is essential to deep clean its individual components meticulously. The process involves using soapy water, a clean cloth, mild soap, and a sponge to wash and maintain different parts such as the fan blades, grill, fan motor, and fan housing.
Wash Blades and Grill
The blades and grill of the fan can accumulate a considerable amount of dust and dirt.
One begins by soaking them in warm, soapy water mixed with mild soap or dish soap for a few minutes.
After soaking, use a sponge or a clean cloth to scrub away any stubborn grime.
Once thoroughly washed, they should be rinsed with clean water and dried completely before reassembly.
Clean the Motor and Housing
The motor is the heart of the fan, and cleaning it requires careful attention to avoid damage.
They should unplug the fan and use a dry or slightly damp cloth to wipe down the fan motor and housing.
It’s crucial not to allow water to enter the motor housing, as moisture can impair the electrical components.
For the air filter, if the fan has one, they should follow the manufacturer’s instructions, which often include rinsing or vacuuming to remove accumulated dust.
Drying and Reassembling

After the thorough cleaning of a window fan, the next crucial steps are to ensure all components are completely dry and to carefully reassemble the unit. These steps are vital to maintain the fan’s operation and longevity.
Thoroughly Dry All Parts
Before one can think of putting the fan back together, each part must be completely dry.
It’s recommended to air dry the components on a clean, absorbent surface or to use a dry cloth to dab away moisture.
Care should be taken to remove all water from the fan blades, housing, and especially from any electrical parts.
Fans should not be reassembled while any part is damp as this can result in damage or unsafe conditions.
Reassemble the Fan
Once the pieces are dry, the reassembly can begin.
Start by aligning the fan blades with the motor shaft and securing them with the screws.
Tighten any nuts or screws by hand first, then use tools if necessary to ensure they’re snug, but avoid over-tightening which might strip the threads.
The frame or casing should be the last to be fixed back in place. Double-check that all parts are positioned correctly and are stable to ensure the fan functions safely and effectively upon use.
Final Steps

Before the window fan is ready for use or storage, it’s essential that the user ensures its performance and safety. Testing and proper placement are critical for maintaining the fan’s efficiency and prolonging its life.
Test the Window Fan
After cleaning and reassembling the window fan, the user should perform a test run to confirm it’s working correctly.
They should plug in the fan and turn it on, checking for any unusual noises which could indicate a problem.
The user should pay attention to the airflow and performance, making sure the fan operates at its expected efficiency.
If any issues arise during this test, it may require a second look to address possible obstructions or incorrect assembly.
Position and Store
If the window fan is to be used immediately, the user should place it correctly to maximize airflow and enhance cooling efficiency.
The fan should be positioned securely in the window, ensuring that it’s mounted safely and won’t fall out.
For fans that need to be stored, they should find a dry and cool place, free of dust.
It’s best to store the window fan in its original packaging or cover it with a protective cloth to prevent dust accumulation and protect it from damage while not in use.
Proper storage will help maintain the fan’s condition and readiness for its next use.
Regular Cleaning and Maintenance
Regular cleaning and maintenance of a window fan are essential to ensure optimal air quality and longevity of the unit.
By setting a consistent cleaning schedule, one can enjoy the cooler air during the summer months and maintain the fan’s effectiveness.
Routine Dusting
Frequency: At least once a week
- Tools Needed:
- Soft-bristled brush
- Microfiber cloth
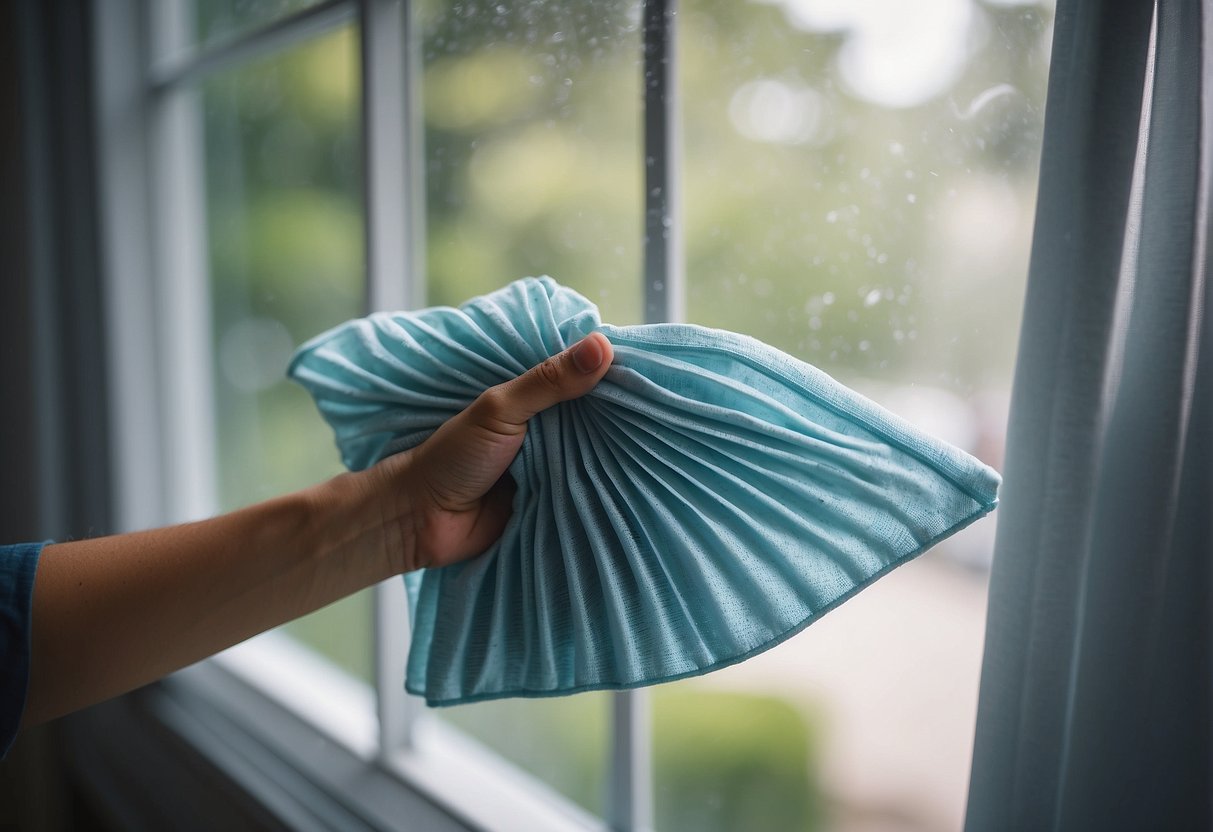
The owner should gently brush away surface dust from the fan blades and exterior grill. For more persistent dust, use a microfiber cloth. This weekly dusting helps in preventing dust build-up that can impede the fan’s efficiency and air flow.
Seasonal Deep Cleaning
Frequency: Beginning and end of the summer season
- Steps to follow:
Preparation:
- Unplug the fan for safety.
- Lay it on a flat, stable surface.
Disassembly:
- Remove the front grill and rear guard by unscrewing them if screws are present.
Washing:
- Soak and wash the grills and any removable parts in a warm, mild detergent solution.
- Wipe the non-immersible parts like the fan motor with a damp cloth with a mild cleaner.
Drying and Reassembly:
- All parts must be entirely air-dried before reassembly.
Seasonal deep cleaning is vital to the fan’s maintenance, and it helps in maintaining high indoor air quality. Cleaning the internal components, such as the blades and motor housing, helps in preventing the accumulation of dirt and grime that can wear down the fan’s parts over time.
Safety and Usage Tips
When cleaning a window fan, safety is paramount. It’s essential to minimize risks of accidents or malfunctions. These tips guide you through safe handling and maintenance.
Avoid Water Exposure
To protect against electrical safety hazards, always unplug the fan before you start cleaning. Also, avoid direct contact with water. This prevents moisture from entering the electrical components, which could lead to short circuits or other malfunctions.
In the event of accidental water exposure, allow the fan to dry thoroughly in a safe, sunny area to eliminate residual moisture.
Handle with Care
When disassembling a window fan, be sure to handle each part with care. This prevents damage or accidents upon reassembly. Ensure that all screws and clips are secured when putting the fan back together to maintain its structural integrity. Regular checks for loose fittings can prevent unexpected breakdowns or safety issues during operation.
Troubleshooting
When cleaning a window fan, it’s important to approach troubleshooting systematically to maintain functionality and performance. This section addresses some common issues and provides direct solutions.
Frequently Asked Questions
Q: Why isn’t my window fan working after cleaning?
- A: It could be due to improper reassembly or electrical connections. Make sure all parts are put together correctly and the plug is securely connected.
Q: What should I do if my fan makes noises post-cleaning?
- A: Check for any loose screws or debris. Tighten any loose parts and remove debris for optimal performance.
Common Issues and Solutions
Motor Not Working: Verify that the fan is plugged in and the outlet is functional. If it still doesn’t turn on, inspect the cord for damage.
Decreased Airflow:
- Clean the Blades: Dust on the blades can hinder airflow. They should be completely cleaned with a soft cloth.
- Check for Obstructions: Ensure nothing is blocking the fan’s air intake or exhaust.
Strange Noises: Loose components can vibrate, creating noise. Tighten any loose parts and ensure the fan is properly assembled.
Persistent Odor: If an unpleasant smell persists:
- Wipe the Blades: with a mixture of water and mild detergent.
- Clean the Grill: using a vacuum with a brush attachment, as recommended for keeping the fan dust-free.
Conclusion

Regular maintenance of a window fan ensures optimal efficiency and supports good air quality in one’s home.
They should conduct a thorough cleaning of their fan at least once a season. This prevents dust build-up that can burden the motor and diminish the fan’s performance.
- Regular Dusting: Ideally, one should lightly dust their window fan weekly.
- Thorough Cleaning: A deep clean, which includes disassembling, washing, and drying the parts, is recommended every few months.
Maintaining their window fan not only extends its lifespan but also contributes to a healthier living environment.
Clean fans effectively circulate air, providing a refreshing and comfortable atmosphere. By adhering to these maintenance tips, individuals can enjoy the benefits of their window fan for years to come.