Install Bathroom Fan Without Attic Access: A Step-by-Step Guide
Installing a bathroom fan without attic access may seem daunting, but it’s a manageable task with the right guidance and tools. Often, homes without easily accessible attics require alternative methods for installation that don’t compromise functionality or style. A new bathroom fan can significantly improve air circulation, prevent mold, and reduce excess moisture.
The process involves careful planning, such as selecting the appropriate fan size and ensuring that it fits into the existing space between the ceiling drywall.
The installation process starts with turning off the power to the bathroom to ensure safety. From there, homeowners will remove the old fan, if present, and measure the housing to determine the size of the new fan needed.
Detailed instructions on how to proceed with the installation are available from resources, such as the step-by-step guide by upgradedhome.com, which walks through the necessary preparations and precautions.
On top of obtaining the correct fan size, consideration must be given to the ductwork and the venting system, which may involve installing a new duct to lead moisture outside the home.
Homeowners often need specific tools and supplies for the installation, which can include the new exhaust fan, a vent with a flapper, and grating cover.
Helpful tips and common solutions for potential problems encountered during the process can be found in instructional videos like Bathroom Exhaust Fan Replace Upgrade | No Attic Access, providing visual aid that can make the installation smoother.
With careful attention to detail, homeowners can successfully install a bathroom fan without attic access, enhancing their home’s ventilation and comfort.
Understanding Bathroom Ventilation
In bathroom design, ventilation is crucial for maintaining air quality and preventing moisture-related issues.
Ventilation Principles
Bathroom fans serve to expel humid air generated by activities such as showering or bathing. The principle behind ventilation lies in creating constant airflow.
A good fan moves air efficiently, drawing moist air out and replacing it with drier air from other parts of the home or outside. This exchange helps to manage humidity levels and preserve a comfortable environment.
Importance of Proper Ventilation
Proper ventilation is essential for preventing mold and mildew growth, both of which thrive in damp conditions.
By quickly removing excess moisture, a well-ventilated bathroom can maintain better air quality. The absence of adequate exhaust can lead to paint peeling, warped doors, or other moisture damage.
Pre-Installation Preparation
Before starting the installation of a bathroom fan without attic access, one needs to gather all necessary tools and ensure safety measures are in place. This preparation is crucial to a smooth and safe installation process.
Tool and Material Checklist
One will need the following tools and materials for the task:
- Ladder or Step Stool: To reach the bathroom ceiling comfortably.
- Circuit Tester: To ensure power is off before starting work.
- Drill: For creating or enlarging holes in drywall or ceiling.
- Screwdriver: For securing the fan to framing.
- Measuring Tape: To measure the fan housing and area on the ceiling.
- Pencil: For marking the area where the fan will be installed.
- Utility Knife: For cutting drywall or trimming if necessary.
Safety Measures and Considerations
When installing a bathroom fan, safety is paramount. Here’s what to keep in mind:
- Turn Off Electricity: Use a circuit tester to confirm the power is off to avoid electrical shock.
- Stable Support: Ensure the ladder or step stool is stable and safe to prevent falls.
- Protective Wear: Consider wearing safety glasses and gloves to protect from debris.
Taking these preliminary steps will not only help in a successful installation but also keep one safe through the process.
Bathroom Fan Essentials

Installing a bathroom fan without attic access demands careful consideration of the fan’s design and specifications. Picking the right model with the appropriate features is crucial for optimal ventilation in a confined space.
Choosing the Right Bathroom Fan
When selecting a ventilation fan for a bathroom without attic access, size matters.
One must ensure the fan fits within the existing space between the drywall.
It’s not just physical size that’s important, but also the fan’s capacity to move air, measured in cubic feet per minute (CFM).
A general rule is to aim for a fan that offers 1 CFM per square foot of bathroom area.
For the installation process, one can find guidance on how to execute this without attic access by referencing sites like Upgraded Home.
Understanding Fan Specifications
Bathroom fans come with various specifications that can enhance their functionality.
A fan’s CFM rating is crucial as it indicates the amount of air the fan can circulate, usually ranging from 50 to 110 CFM for standard bathrooms.
For larger spaces or bathrooms with higher ceilings, a higher CFM may be necessary.
Some fans also incorporate a humidity sensor, which activates the fan when moisture levels in the air reach a certain threshold, thereby preventing mold and mildew growth.
Special features, such as a built-in light, can add utility while maintaining the fan’s sleek design.
It’s important that the chosen fan suits one’s specific needs and fits the space available, ensuring efficient airflow and a touch of convenience without requiring attic access.
Installation Process

Properly installing a bathroom fan without attic access requires precise cutting, careful wiring, secure mounting, correct venting, and neat finishing. This guide outlines each step to help homeowners achieve a seamless installation.
Cutting the Ceiling Opening
First, they must measure the housing of the new fan and mark the drywall for the opening.
Using a keyhole saw, they carefully cut out the marked area. It’s crucial to ensure the opening is snug to avoid gaps that could impair the fan’s efficiency.
Wiring the Fan
Once the opening is ready, the next step is handling the electrical wiring.
They will need to turn off the electricity to the bathroom at the circuit breaker for safety.
They then prepare the fan’s wiring to connect with the house’s wiring, carefully following the fan’s installation instructions.
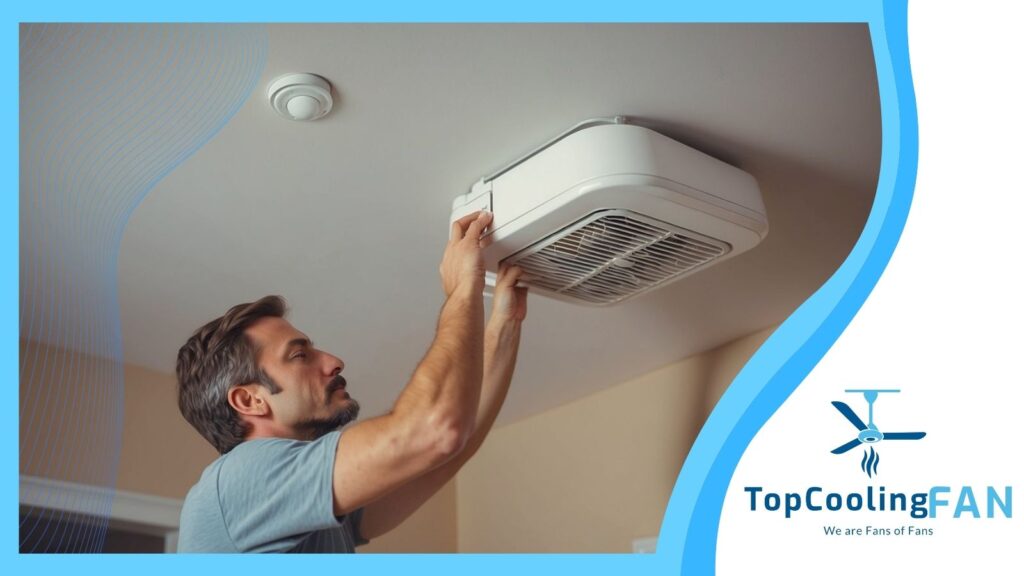
Securing the Fan Housing
The fan housing needs to be firmly attached to the ceiling joists or framing.
They should position the housing in the opening and use a screwdriver to secure it with screws. Ensuring the housing is level is important to avoid operational issues with the fan.
Ductwork and Venting
Proper ventilation is critical to prevent moisture build-up.
They must connect the fan’s duct connector to the existing ductwork using foil tape and, if necessary, a duct adapter to match the duct size. The other end of the ductwork comes out at an appropriate vent point.
Finishing Touches
Finally, they need to ensure that everything is sealed and finished neatly.
They should use caulk to seal the fan housing edge and replace the drywall cutout if needed. After applying the finishing touches, the fan cover can be installed, and the electricity turned back on to test the installation.
After Installation

Once the bathroom vent fan is installed, it’s important to ensure that it operates correctly and to keep it well maintained for effective air circulation.
Testing the Fan
To test the fan, one should start by turning the power back on at the circuit breaker.
Then, activate the fan by using the switch in the bathroom.
They should listen for the fan to initiate and check for proper air circulation. The fan should be audible and the air should be felt moving out of the vent.
Maintenance Tips
For optimal performance, individuals should clean the fan regularly by removing the cover and using a soft brush or vacuum to remove accumulated dust.
The vent cover should be washed with mild soapy water and dried fully before replacing it.
Regularly checking for obstructions or debris in the vent will also ensure that the fan maintains good air circulation.
Maintaining the bathroom fan involves scheduling periodic checks besides regular cleaning. Experts often recommend inspecting the fan every six months to ensure its longevity and efficiency.
When to Call a Professional

When installing a bathroom fan without attic access, homeowners might find it necessary to call a professional for various reasons.
The need for an electrician is particularly high when dealing with the electrical components of the fan installation. A licensed electrician will ensure that all connections meet local code requirements and are safely executed.
Cost is another factor to consider. Although hiring a professional will incur additional expenses, they can provide a clear estimate of the materials and labor involved.
This upfront clarity can prevent unexpected costs that may arise from DIY attempts gone awry.
Homeowners should consider seeking professional help in the following situations:
- Complex Electrical Wiring: If the bathroom fan’s wiring diagram seems complicated or unfamiliar.
- Uncertainty: If they are unsure about any step of the installation process.
- Safety Concerns: If they feel unsafe working with electrical components or lack the proper safety equipment.
- Local Building Codes: If they’re unaware of their local building codes, which might require the work to be done by a licensed professional.
Professionals bring the right tools and expertise, ensuring that the bathroom fan is installed efficiently and functions correctly. They carry insurance and offer warranties on their work, providing additional peace of mind.
Additional Considerations

Before installing a bathroom fan without attic access, it’s essential to understand potential issues that may arise as well as opportunities to improve energy efficiency with upgrades.
Appropriate planning ensures that the installation of the fan strengthens ventilation without compromising structural integrity or energy performance.
Dealing With Potential Issues
When working within the confines of the ceiling space, one must be prepared to tackle any obstacles.
The ceiling joists may dictate the positioning of the fan’s housing and the vent route. Therefore, measuring the existing fan’s housing or the available space is crucial, as this informs the size of the new fan that can be accommodated.
When attaching the new housing, ensure it’s securely fastened to the ceiling joists to maintain stability.
Should the exhaust not lead directly to an external wall, a duct connector may be necessary to link the fan with an appropriate vent point.
Encountering electrical wiring or pipework calls for careful navigation to avoid damage. Tools like cable detectors can assist in identifying hidden obstacles.
Energy Efficiency and Upgrades
Enhancing the bathroom’s energy efficiency could involve installing a fan equipped with a light that uses LED bulbs, which consume less energy.
Newer models of exhaust fans also feature improved motor designs that offer quieter operation while also using less electricity.
For bathrooms that tend to accumulate moisture easily, one might consider a fan with built-in humidity sensors.
These fans activate automatically when a certain level of humidity is detected, ensuring optimal venting without the need for constant manual adjustment.
Incorporating external wall venting, when feasible, minimizes the length of ductwork required, reducing the likelihood of airflow obstruction and boosting overall energy efficiency.
Conclusion

Installing a bathroom fan without attic access can be a straightforward project if one approaches it methodically and with the right guidance. Here’s a brief recap of the essentials:
- Safety first: Always start by turning off the power to ensure a safe working environment.
- Proper sizing: Measure the existing housing and duct to select a compatible new fan.
- Tools and materials: Gather all necessary tools and materials beforehand for efficiency.
One does not need an attic to successfully install a bathroom exhaust fan. By following the correct steps, they can accomplish the task with ease.
These steps include disconnecting the electrical wiring, removing insulation, and ensuring the new fan fits snugly.
For more detailed instructions, reviewing tutorials such as How To Replace A Bathroom Exhaust Fan or guides like How To Install Bathroom Fan Without Attic Access can be beneficial.
Those with minimal experience in DIY projects may also refer to video resources for visual aid. Platforms like YouTube offer step-by-step procedures.
Finally, it’s essential to replace any insulation and secure the grille and housing cover once installation is complete. This will ensure the fan operates effectively and safely.
By keeping these key points in mind, one can complete the installation without the need for professional help, saving time and money in the process.